Software Development Course Labs
Continuous Deployment
There’s a lot to do here. Developers often need to pick up something that’s new to them - new tools, new languages, new services. This will give you a feel for that and it will show you what Continuous Deployment looks like. Don’t worry if you don’t get through all the steps - we’ll walk through it together.
In this lab we’ll create a service in the cloud to run a web application, and set up Continuous Deployment to releases updates to the app in an automated way.
This lab is optional - you need a credit card to sign up to the cloud. You won’t be charged, but if you’d prefer not to follow along it’s fine, you can watch me instead.
Test the web app locally
We’ll start by running the web app on your dev machine so you can see how it looks.
Open a terminal window in VS Code and run these commands to build the application:
cd labs/continuous-deployment/src/HelloWorldWeb

dotnet restore

dotnet build
These are the same commands we used in the Continuous Integration lab but this is a different application. It’s a .NET app so we use the same commands to work with it, but this is a web application.
Run this to start the web app:
dotnet run --urls=http://localhost:5000/
You’ll see some logs in the terminal, and you won’t be able to enter any more commands. The app is listening for network connections.
Check out the app by browsing to http://localhost:5000/
You’ll see a simple page with the date and time. Refresh and the time will update - this is coming from the web server, which happens to be your local development environment:
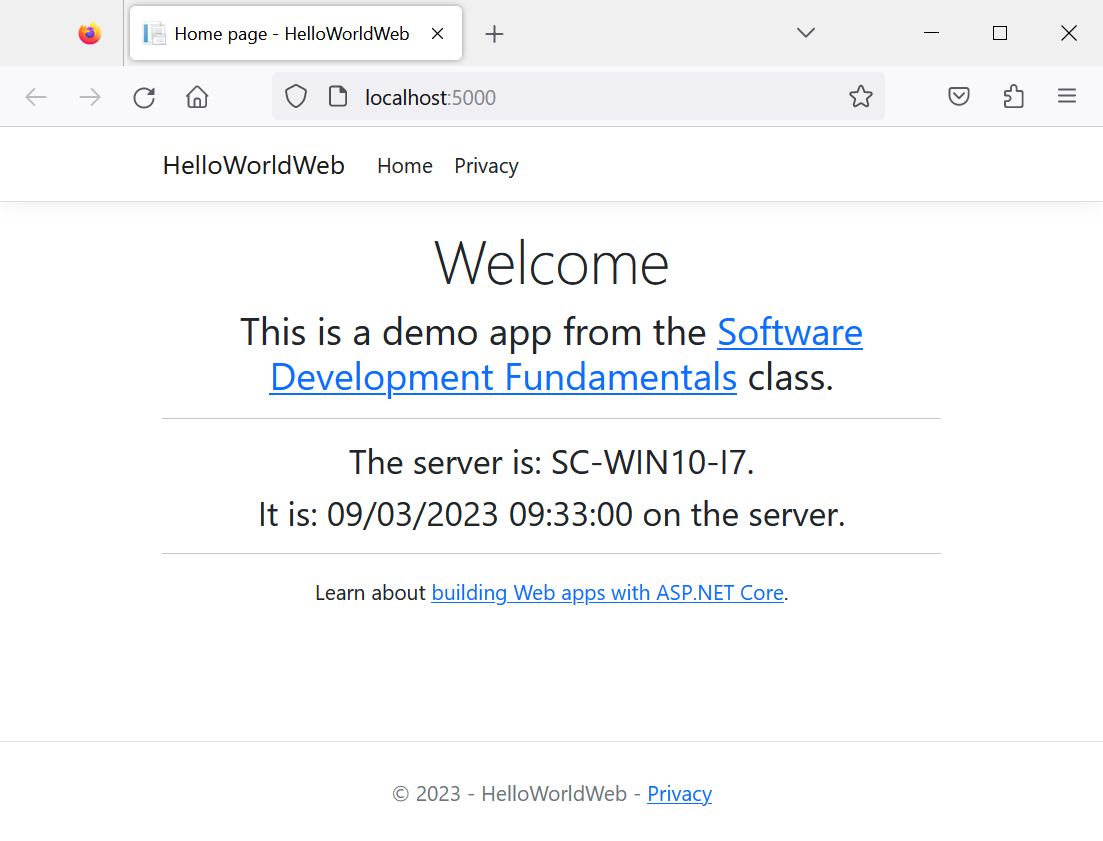
Like most web apps, this uses a mixture of technologies - in this case some HTML and some C#. If you’re interested in the code, this is how that page is written:
- Index.cshtml - the angle-brackets is the HTML and the @-sign is the C#
Some applications are too big and complex to run on a developer’s machine, so they may only be able to run part of it. Larger apps are broken into components, so the dev may only run a few of the components locally.
Now we know how it looks, we can go and deploy it to the cloud!
You can end the web server in the terminal with Ctrl-C.
Create free Azure account
Cloud computing just means renting computers and storage. You never actually see the hardware - that’s in secret datacentres with thousands and thousands of machines. Instead you work with cloud services using tools from the provider.
There are three main clouds (in this order of popularity):
- Amazon Web Services (AWS)
- Microsoft Azure
- Google Cloud
We’ll use Azure because it’s one of the easier services to start with, and it integrates nicely with GitHub to deploy your code.
Sign up for a free Azure account here: https://azure.microsoft.com/en-gb/free/
- you’ll need an email account you can access
- and a cell phone for verification
- you’ll also need a credit card but you won’t be charged
When the sign up process is done click Go to the Azure Portal or follow this link: https://portal.azure.com
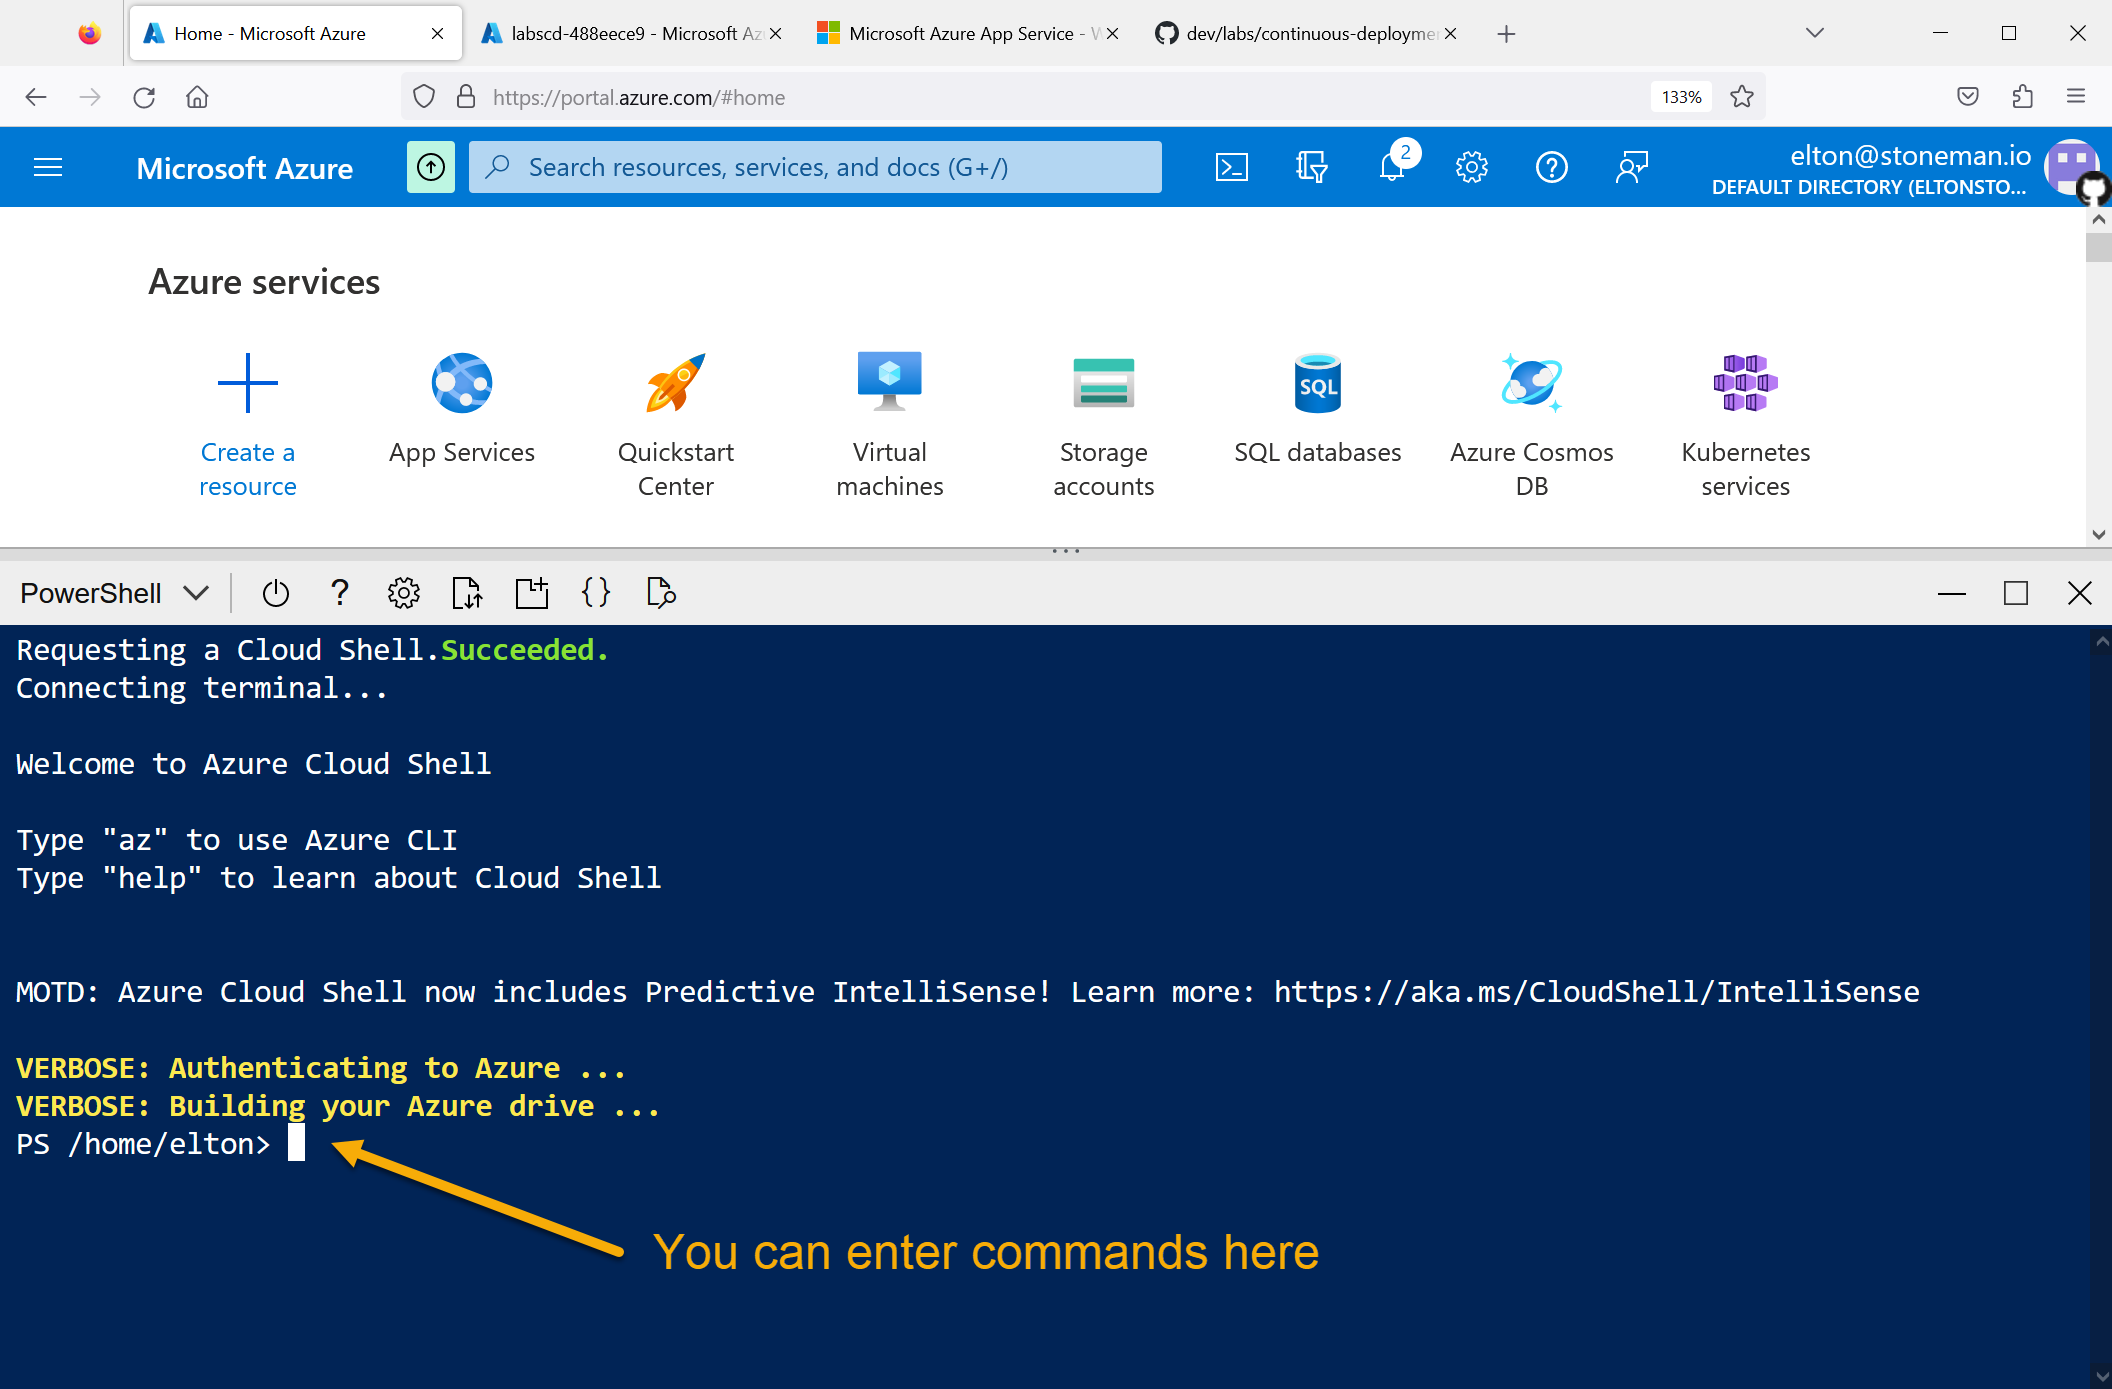
From the icons in the top right, click the console icon (which looks a bir like >_ ):
![]()
This launches a terminal inside the browser called Cloud Shell. It’s just like using the terminal in VS Code, except it’s running inside a cloud environment which has a few more tools installed.
There are two confirmation screens:
- Select PowerShell in the first
- Click Create Storage in the second
Now the bottom of the Portal window will have the terminal session:
You can use the terminal in Azure to create a cloud service which will run the web application.
Create the Azure resources
The cloud shell has Git installed so we can clone the class repo:
git clone https://github.com/courselabs/dev
There are several commands we need to run. Instead of copying and pasting them one at a time, I’ve created a script file which contains all the commands. It uses the Azure command line tool (called az) - if you’re interested, you can find it here:
- setup.ps1 - the PowerShell script to set up the web app service
Now run the script to create the cloud service.
The script will ask you for your GitHub username - just enter the username you used when you created your GitHub account, e.g. I would type sixeyed
./dev/labs/continuous-deployment/setup.ps1
This script does quite a few things and it will take a while. If you see warning messages about something called Blowfish, you can ignore them :)
The last step of the script does the deployment. This is a different approach to GitHub actions, where you have to write your own workflow file. Here the cloud service takes the source code, it knows that it’s a .NET app and it knows how to build and deploy it. You don’t need to manage the pipeline.
While the build is happening you can browse to your app service here: Azure App Services.
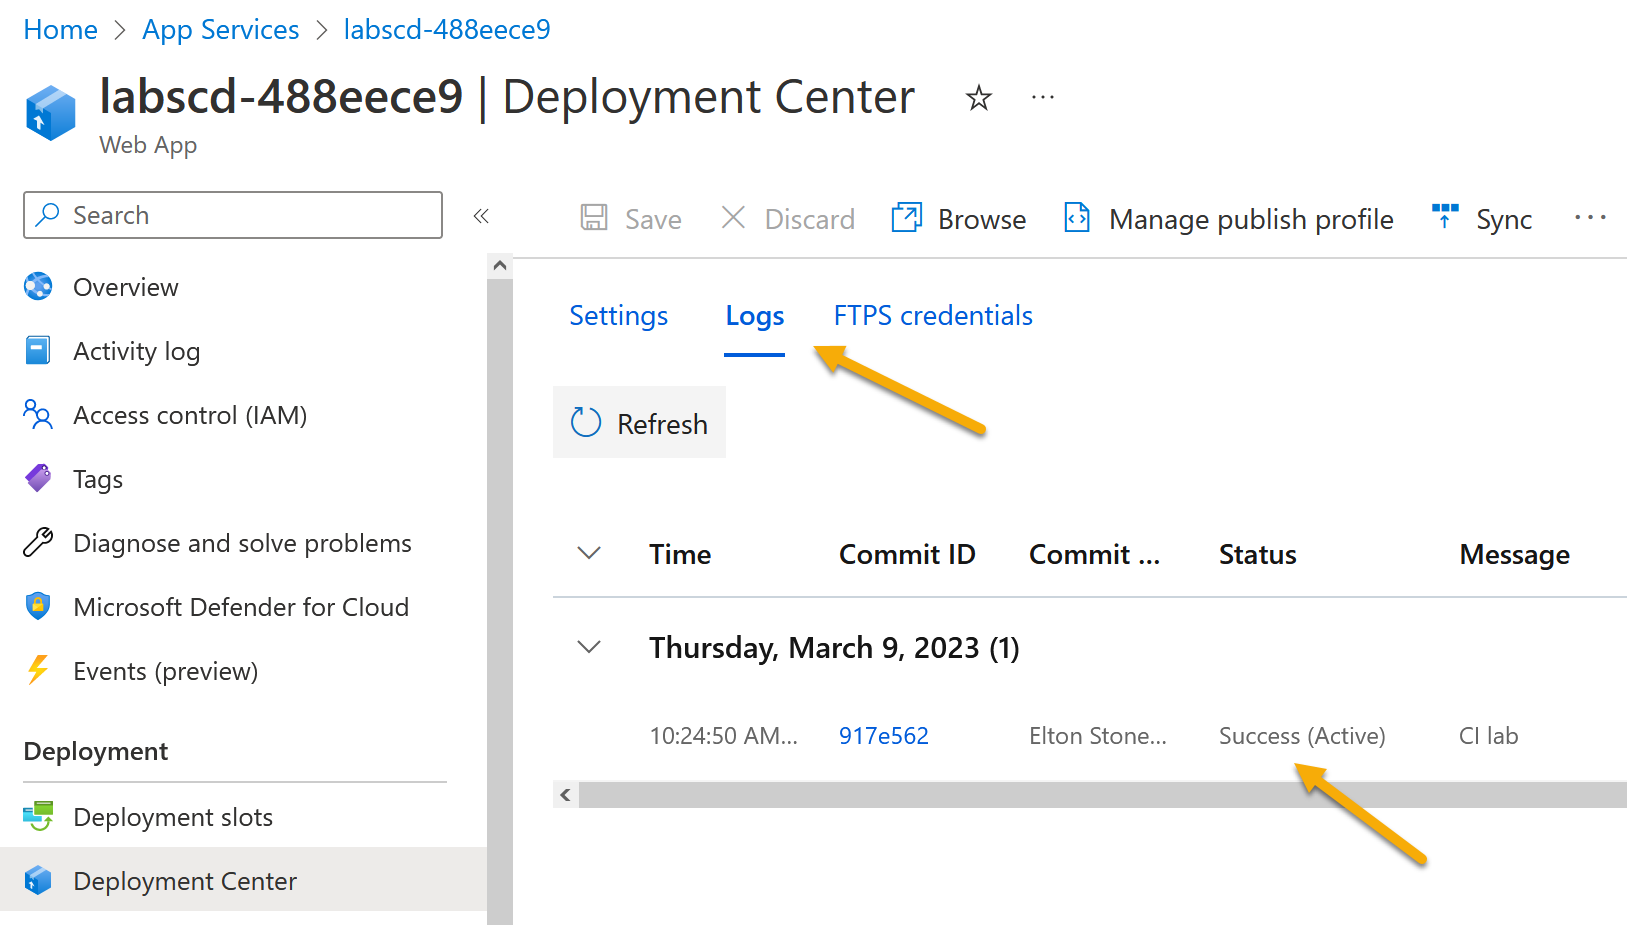
Cick your App Service name to open the details page. In the left navigation click the Deployment Center link:
- this shows you that your service is linked to your GitHub repo
- click Logs and you’ll see the history of the deployments
- the status field may say Pending or Running
- when the deployment completes the status will be Success (Active):
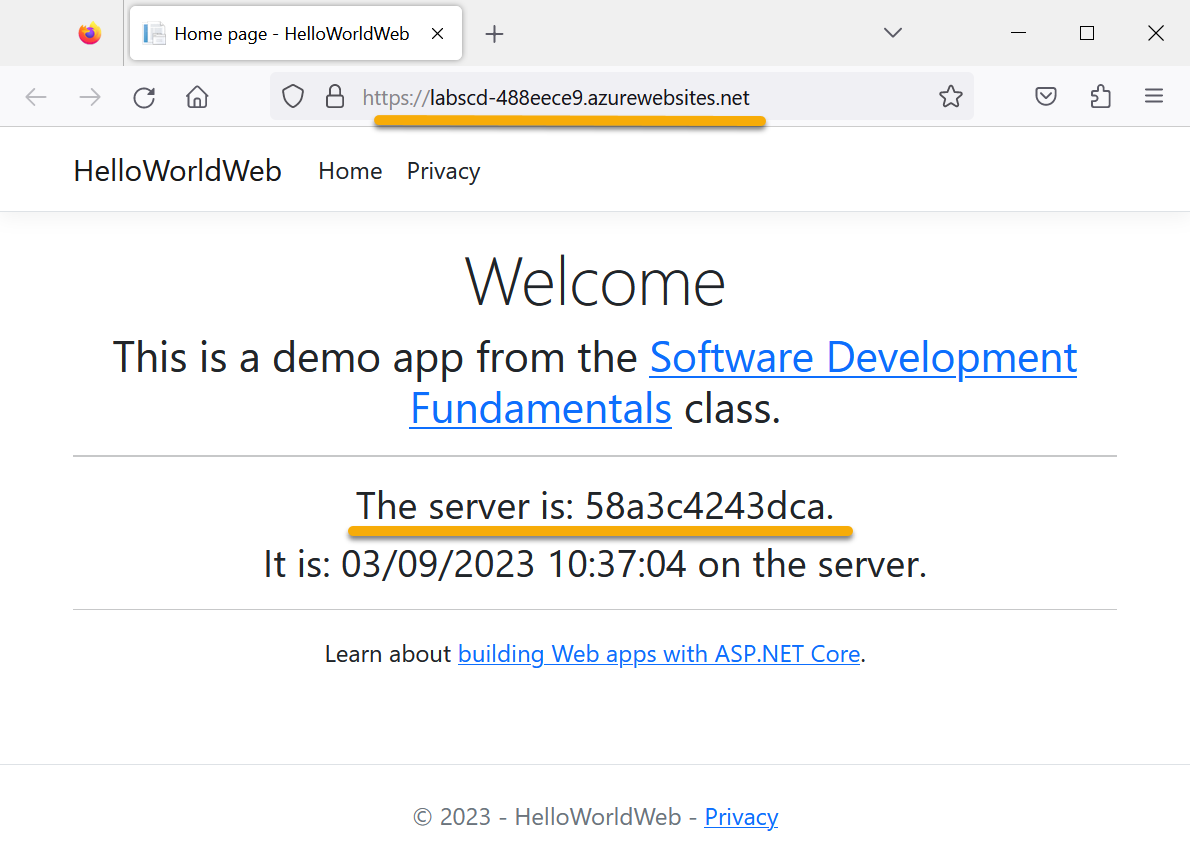
Click back to the Overview section on the left, and in the right hand side you’ll see Default domain with a link that looks something like labscd-488eece9.azurewebsites.net (yours will be similar but not the same).
Click that link and you’ll see your web app running in the cloud. This is the same app you ran on your laptop, but now it has a public URL anyone can access, and it can handle thousands of users:
Lab
How was that? Lots of new things here - the cloud services, the command line script to create the service, and the whole continuous deployment. It’s not really continuous though, the script sets it up for manual deployment. Try making a change to the web page source code:
Any change will do, but something in the HTML that you will notice in the browser. Then push your changes to your fork:
git add --all

git commit -m 'Updated CD lab web app'

git push fork main
Pushing your changes doesn’t trigger a deployment in Azure. You’ll need to manually start a new deployment from the Azure Portal to sync your changes. Can you trigger that and see your changes get deployed to the live site?