Software Development Course Labs
Application Environments
The live application where users log in and do their stuff is usually only one of many copies of the app. Those copies are called environments and they’re not exact copies - the live production environment is running one version of the code. You may also have a test environment running a newer version with the features being added in this sprint. That isn’t publicly available, it’s just a safe place for the team to test work without breaking the live app.
In this lab we’ll see how you can use deployment slots in a cloud service to provide different environments.
This lab is optional - you need to have done the Continuous Deployment lab first, setting up your app deployment in Azure. If you haven’t done that one, you can watch me instead.
Reference
-
Working in pre-production environments - UK Government
-
Staging slots in Azure App Service - Microsoft
Create a deployment slot
Cloud services use different terminology for environments. In Azure App Service (which we used in the Continuous Deployment lab) they’re called deployment slots. Slots can be deployed from different branches, and they can have different configuration settings.
Open the list of app services:
- https://portal.azure.com/#view/HubsExtension/BrowseResource/resourceType/Microsoft.Web%2Fsites
Find your web app in the list and click Deployment slots from the left menu bar:
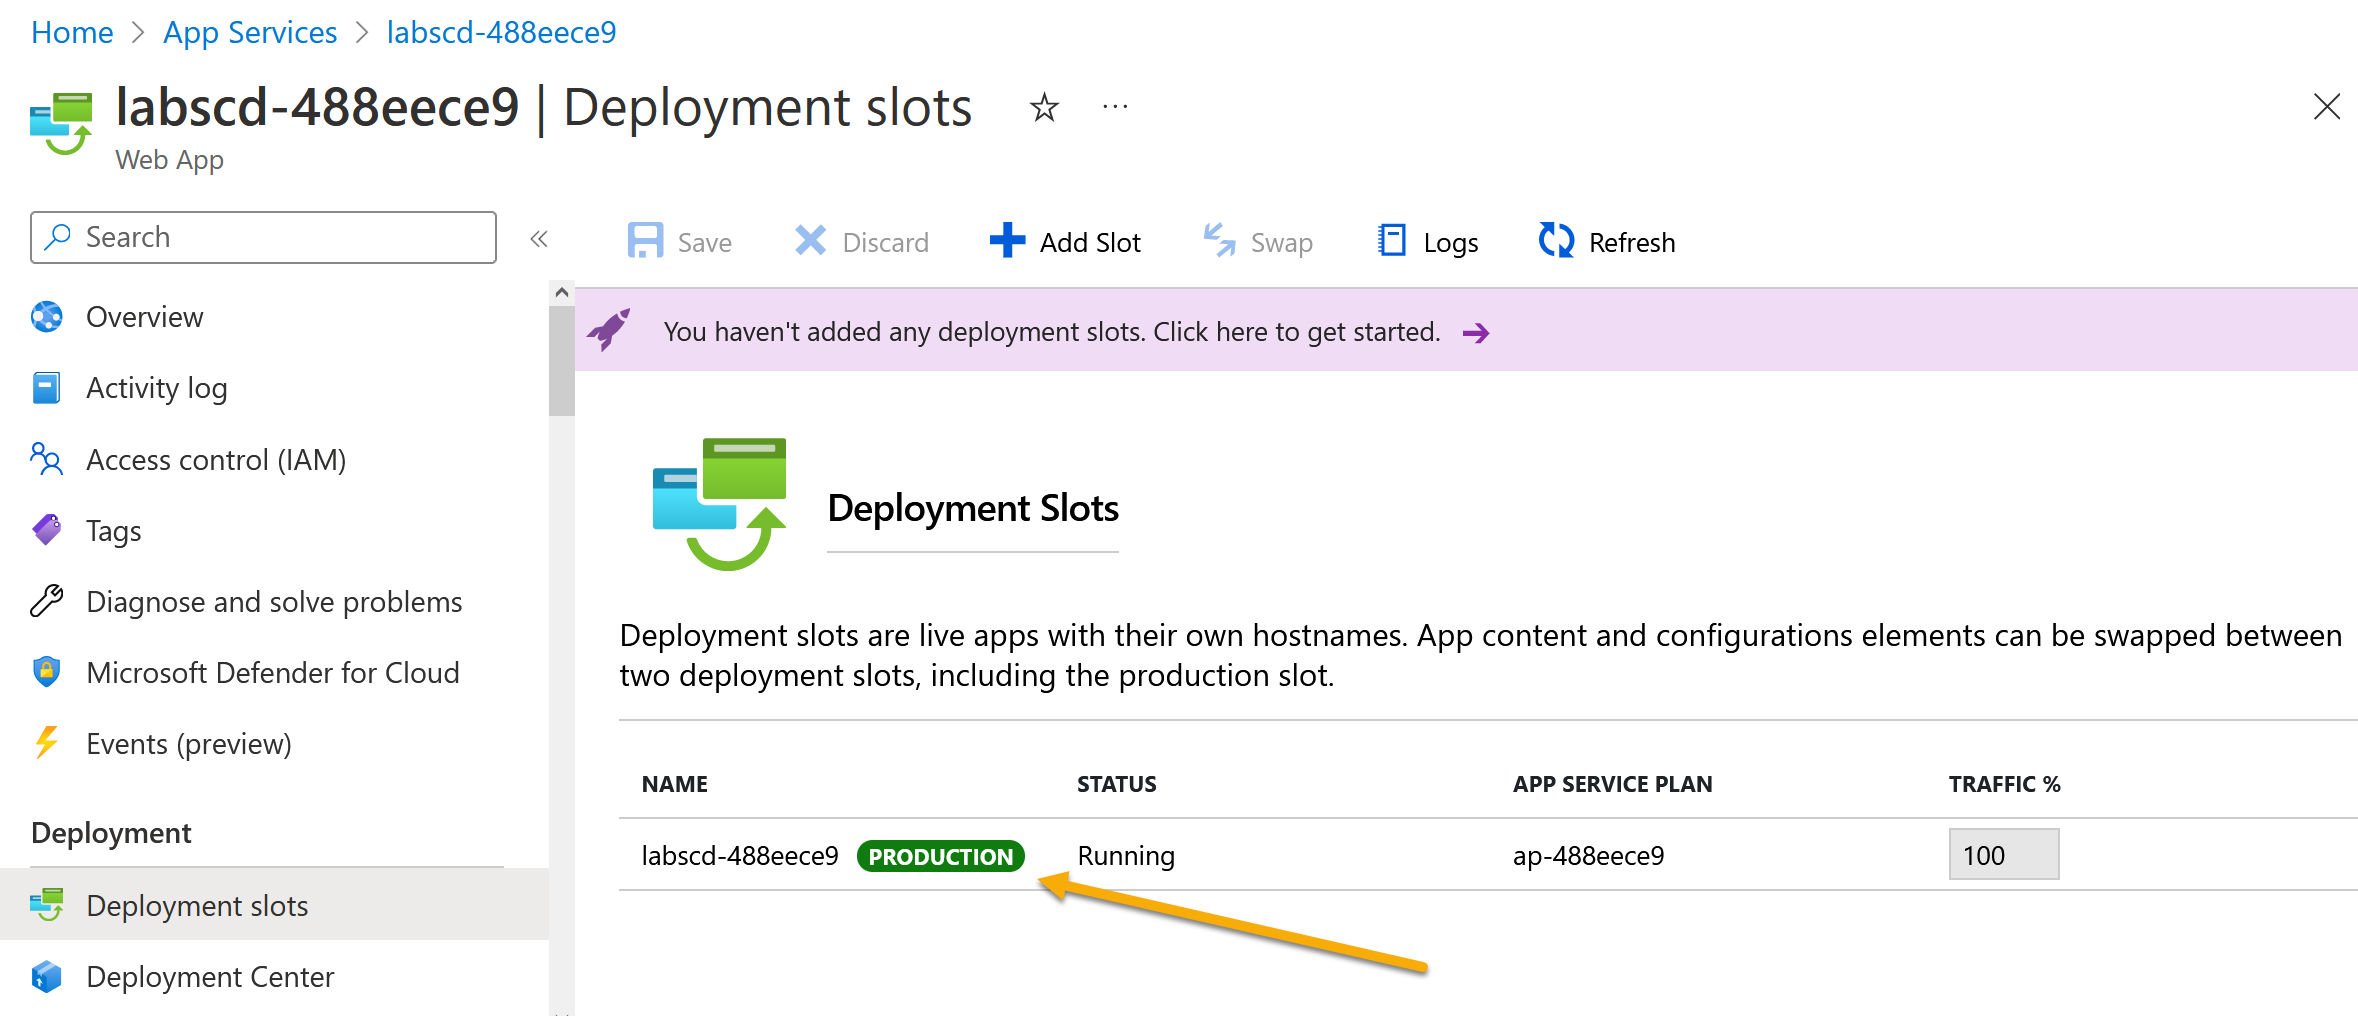
You’ll see one slot which is your production environment. This is deployed from the main branch.
Add a new slot by clicking the Add Slot button:
- give it the name staging
- under Clone settings from - select your original web app from the list
- click Add
This effectively creates a copy of your app, which has it’s own URL and can be deployed from a different branch.
A staging environment is one where changes are published so they can be checked before you go live.
Click on the staging slot name, and the Azure UI will load the configuration for that slot:
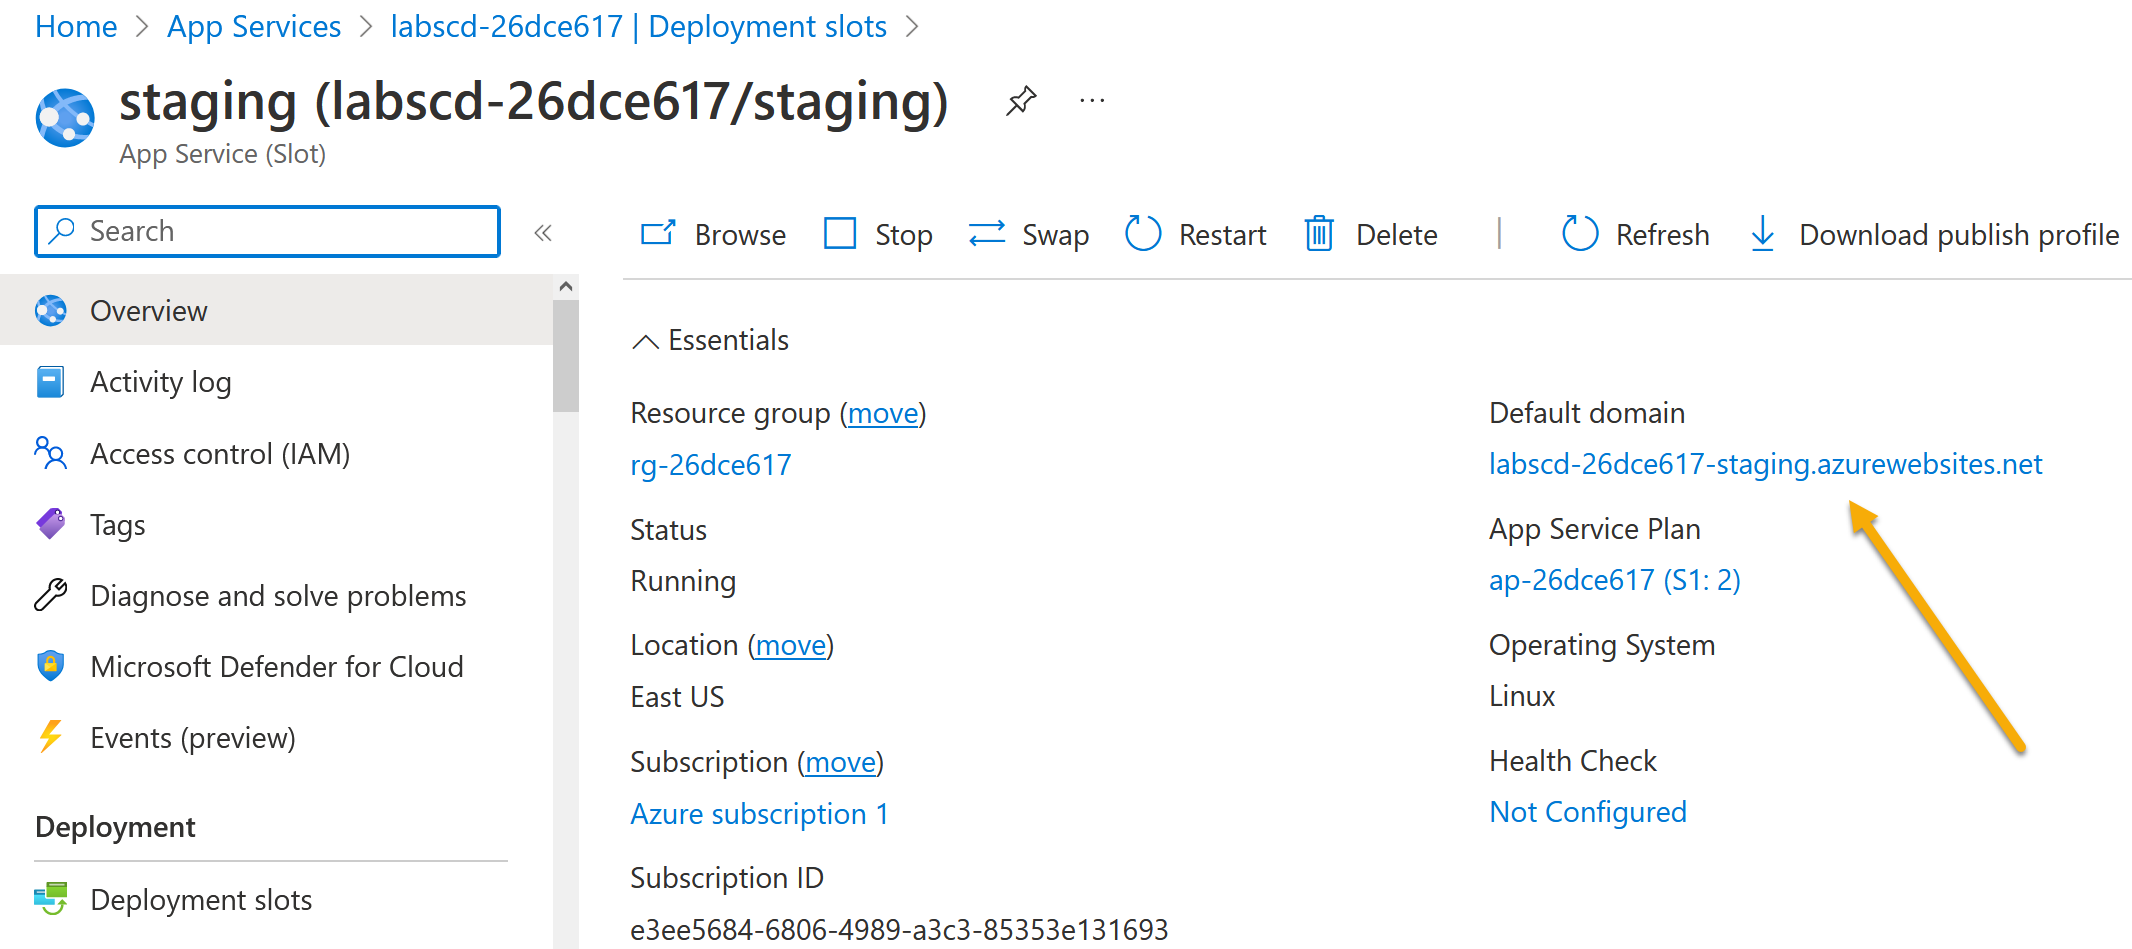
You can have multiple slots, each with their own URL. Slick teams will have a CI/CD pipeline which runs on all branches and automatically creates a slot for each feature branch, so new features can be tested independently.
Open the URL for the staging slot. There’s nothing there :) New slots start empty, they need to be configured to deploy from an SCM system like GitHub.
Deploy to the staging slot
Open the Deployment center link from the left menu. For your staging slot it should show you there is no source configured, the Sync button is greyed out because there’s nothing to sync from:
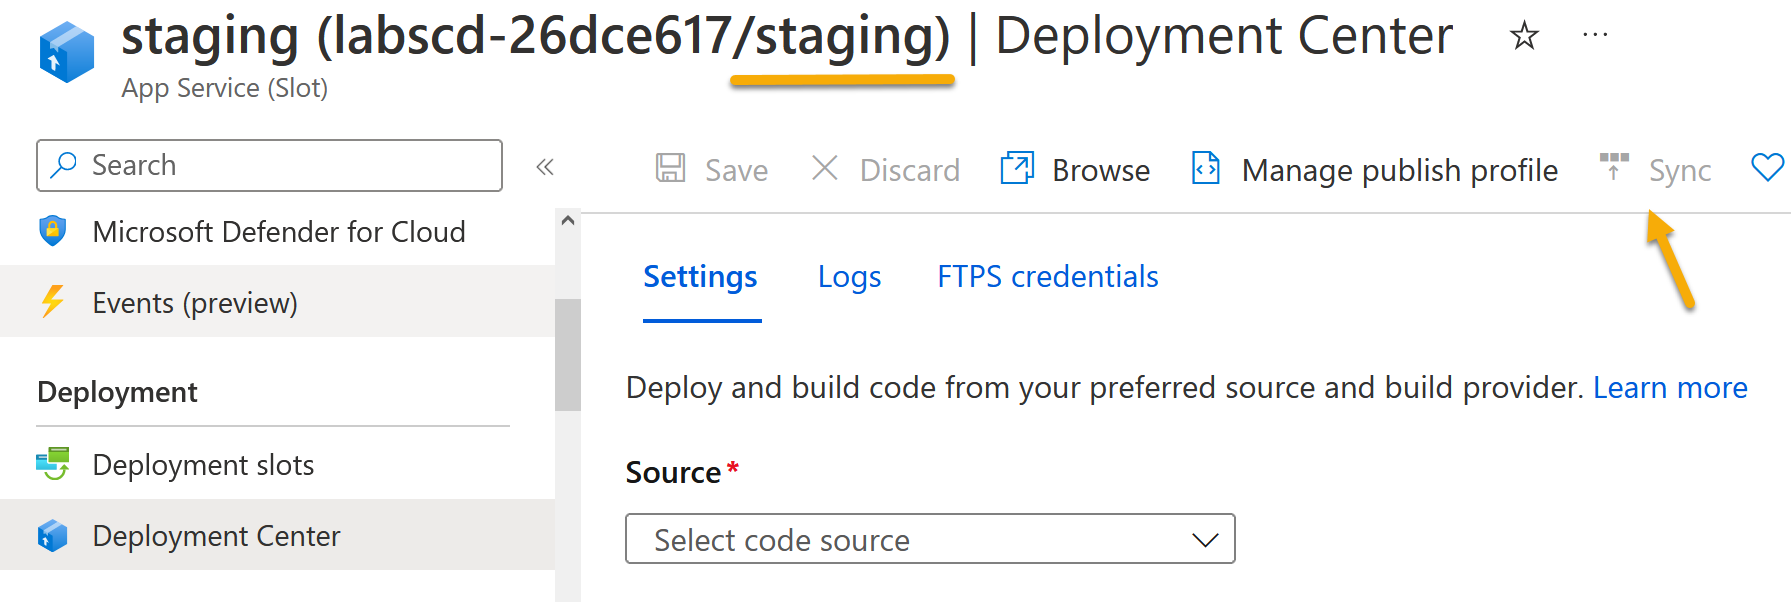
Set up the staging slot so it deploys the same code from the main branch as the production slot (usually it would be a different branch, but this will do for testing):
- Choose External git as the source (not GitHub!)
- Enter your GitHub repository URL -
https://github.com/your-github-username/dev.git - Enter
mainas the branch - Click Save
The deployment will start. Under the Logs view you can check the status.
It will take a while, but when the app is deployed you can browse to the the URL for your staging slot - it looks the same as the main application :)
Change the app configuration
We can change the setup of the app in the staging slot and this will show how it can be different from the production slot.
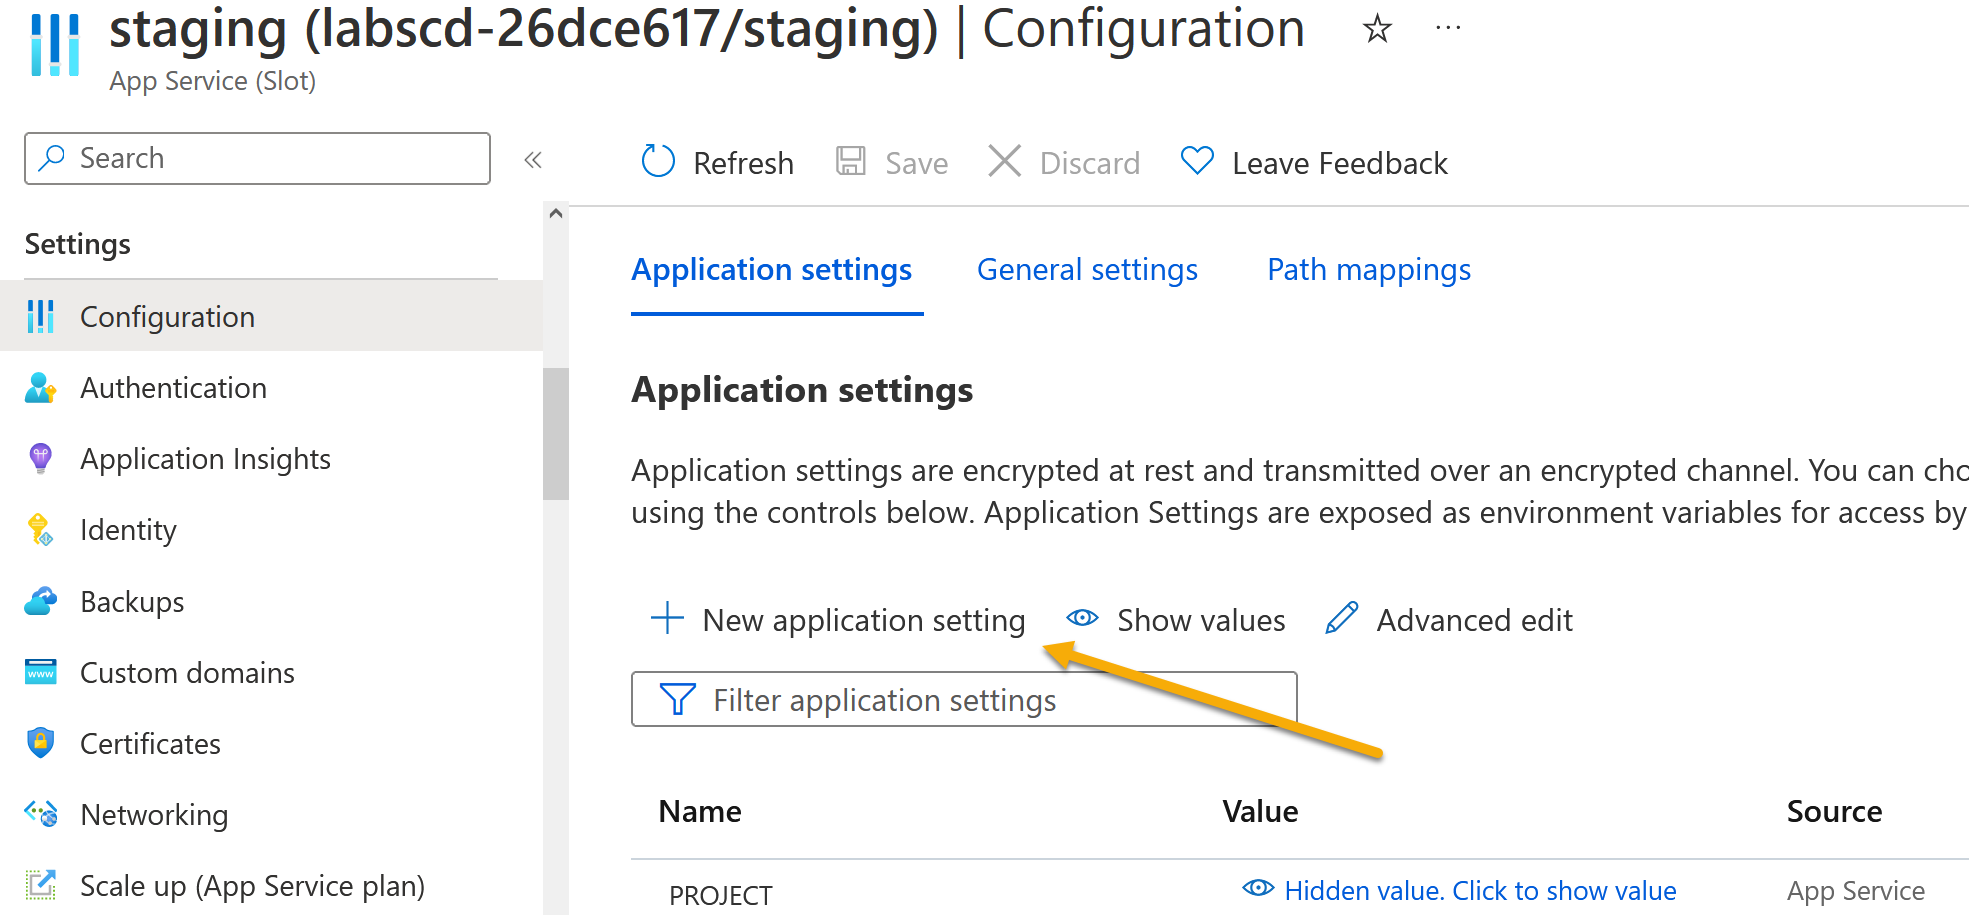
Open the App Service page for the staging slot in the Azure Portal, click the Configuration item from the left menu bar. You’ll only have one application setting at the moment called PROJECT:
Configuration settings are used to change application behavior. Things like the address of the database will be different between environments, so that could be a configuration setting. Or the amount of memory to use for storing data might be set differently in production. Some teams use settings for feature flags - so a new feature can be turned on in one environment and turned off in another.
Click on the New application setting link and add a new item:
- Name:
EnvironmentName - Value:
staging - Tick the Deployment slot setting box
You need to get this just right, because the application looks for specific setting names and values. It should look like this:
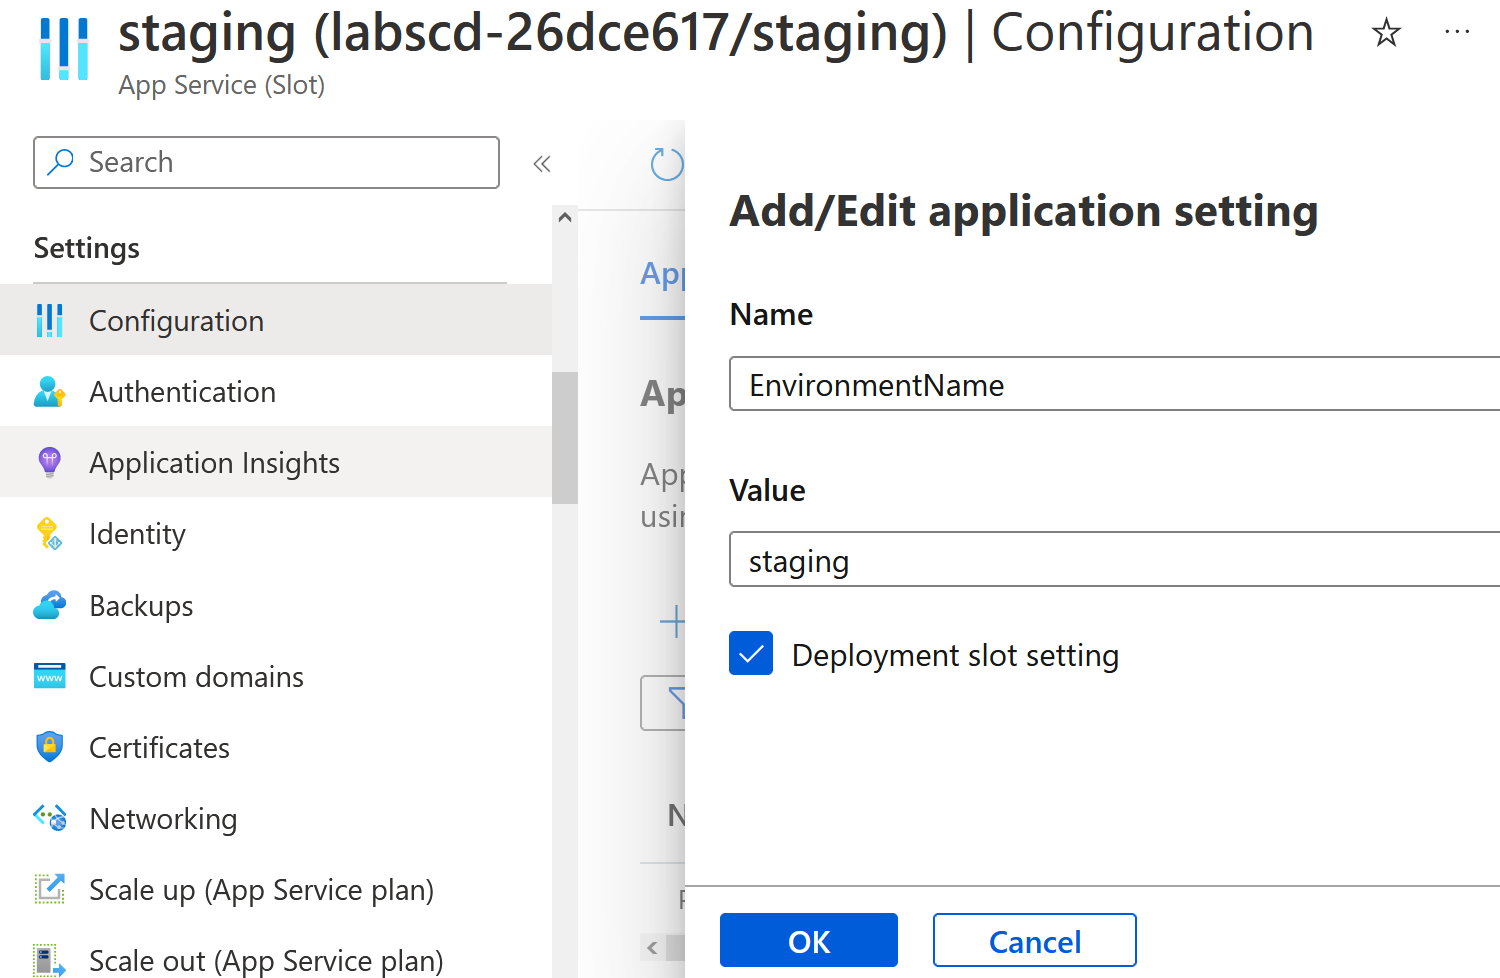
Click OK in the new window and then click Save at the top of the configuration window.
The UI will ask you to confirm, click Continue and then it will restart the app in the staging slot.
Browse to your staging slot deployment again (you can find the link on the Overview page, listed under Default domain).
Once the deployment has finished, it should look like this:
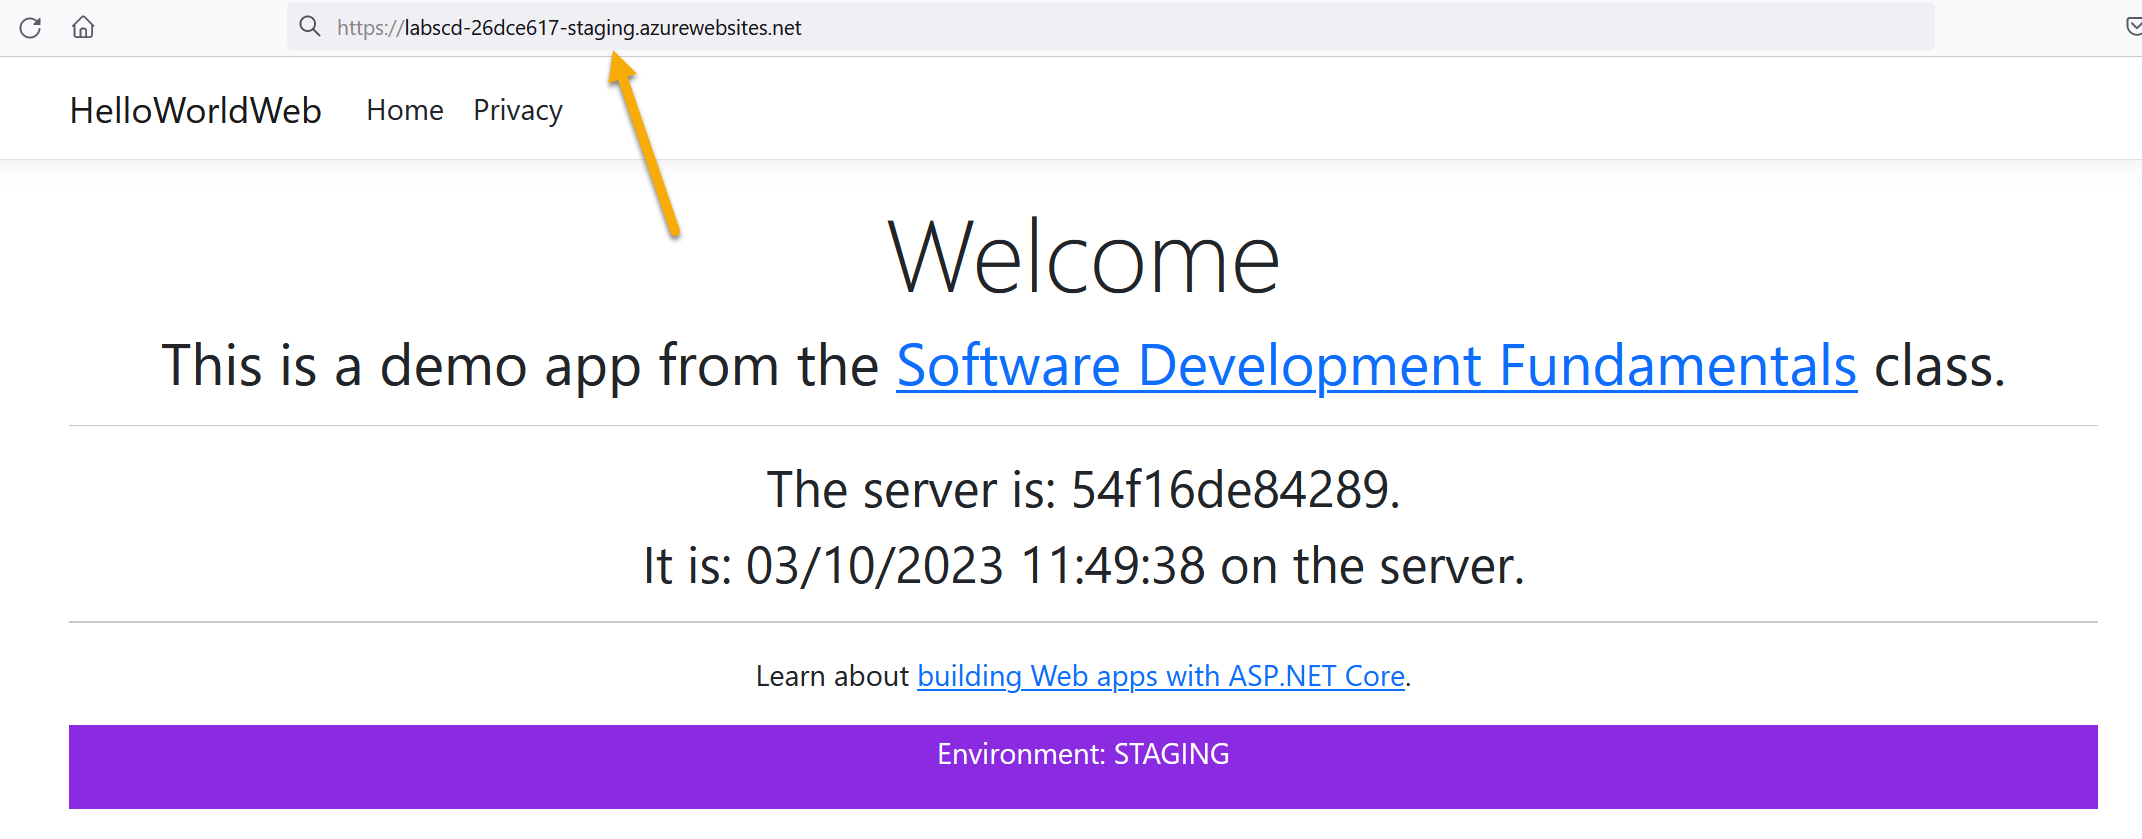
Tricks like this are very common - different environments are effectively near-copies of the same app. You need to make sure you don’t delete something in production because you think you’re in the test environment, so different colors or large text banners help differentiate.
Lab
Apps typically have multiple environments - you’ll probably test new features using one environment, and check bug fixes in another.
See what the app does if you use a different value for the EnvironmentName config setting. You could create another slot for that (you’d need to configure the External git deployment settings again), or just change the value in the staging slot.